Deploy production ready authorizer.dev instance using heroku with PostgreSQL and Redis and build with it in 30seconds

After click the above button you will see screen as below, follow the steps mentioned below:
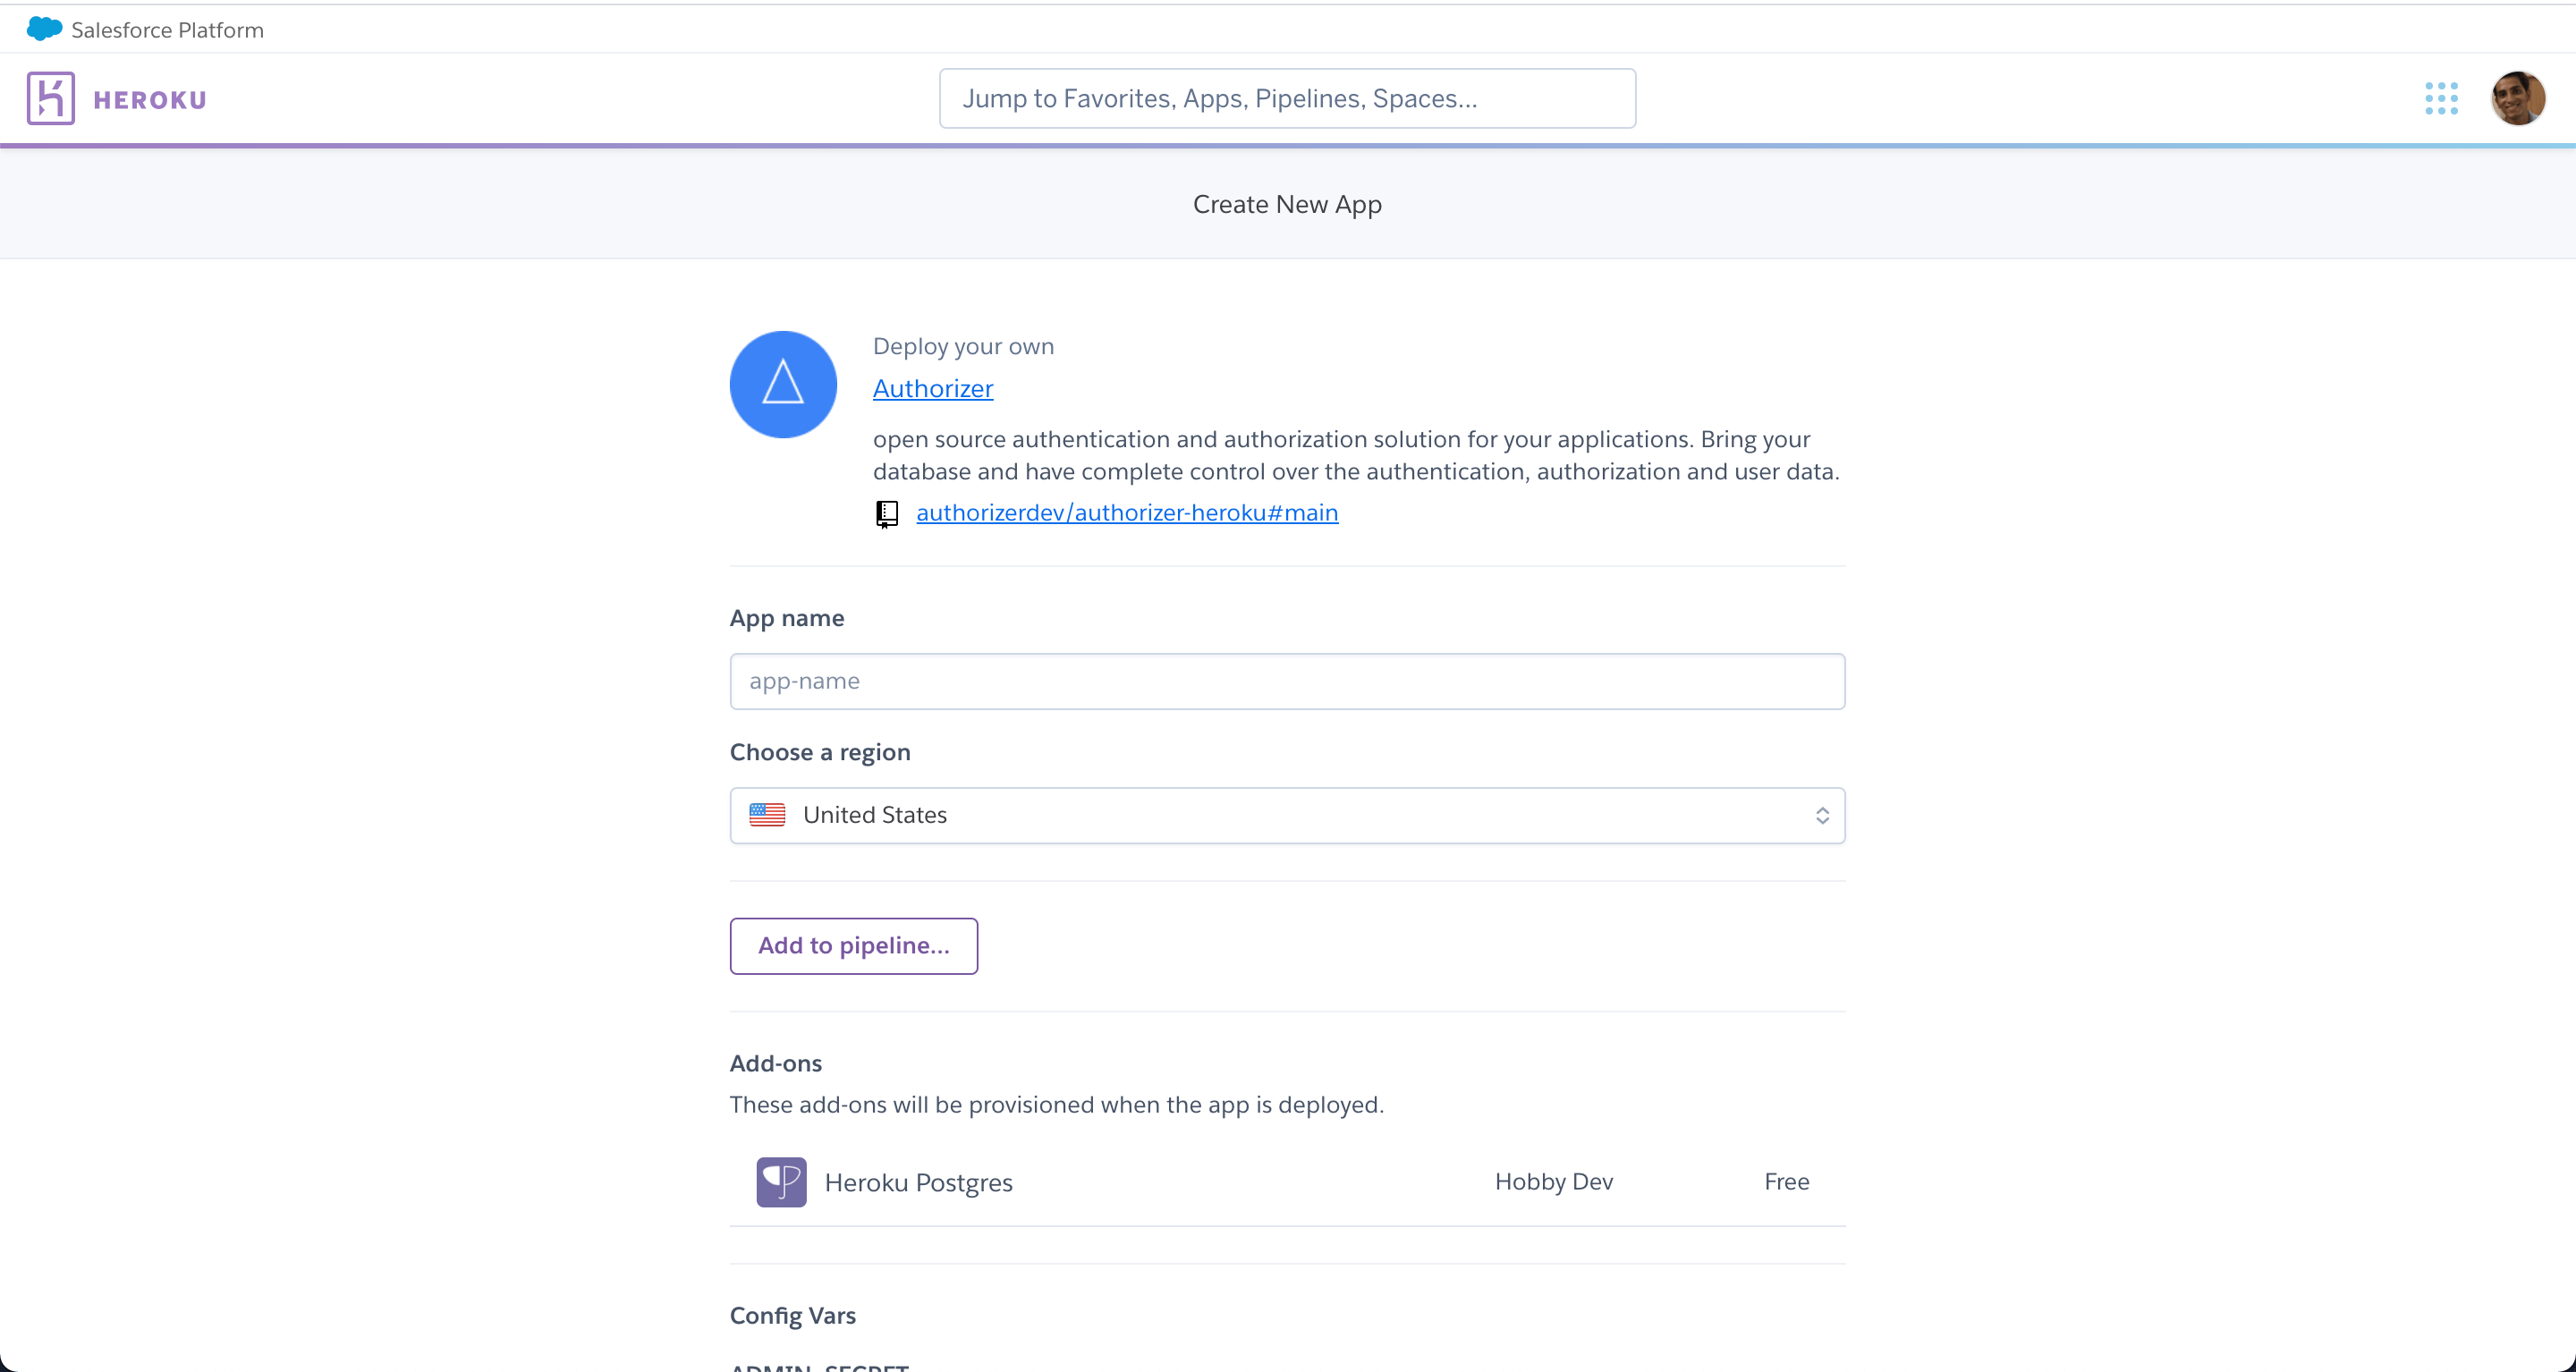
App name becomes the url for your application. Example if you have entered authorizer-demo as the app name then the authorizer url will be authorizer-demo.herokuapp.com.
Select the region you want to deploy you application in. Heroku supports United States and Europe only.
Authorizer v2 requires the following variables. Configure them in Heroku's Config Vars section:
| Variable | Description | Example |
|---|---|---|
DATABASE_TYPE |
Database type | postgres |
DATABASE_URL |
Database connection string | (auto-configured by Heroku add-on) |
JWT_TYPE |
JWT signing algorithm | HS256 |
JWT_SECRET |
JWT signing secret | test |
ADMIN_SECRET |
Admin secret for admin operations | admin |
CLIENT_ID |
Client identifier (required) | 123456 |
CLIENT_SECRET |
Client secret (required) | secret |
These are mapped to CLI flags at startup. Please refer to the server configuration docs for all available flags.
- Source repo: https://github.com/authorizerdev/authorizer
- Docs: https://docs.authorizer.dev/deployment/heroku/
-
You can update the docker image to the desired version in your repository which gets created with your deployment.